Showing posts with label Canvasses. Show all posts

Friday, 19 April 2019

Easter Bunny Blog Hop

Hi Everyone

Who’s ready for the Easter Bunny?  Me....yay!

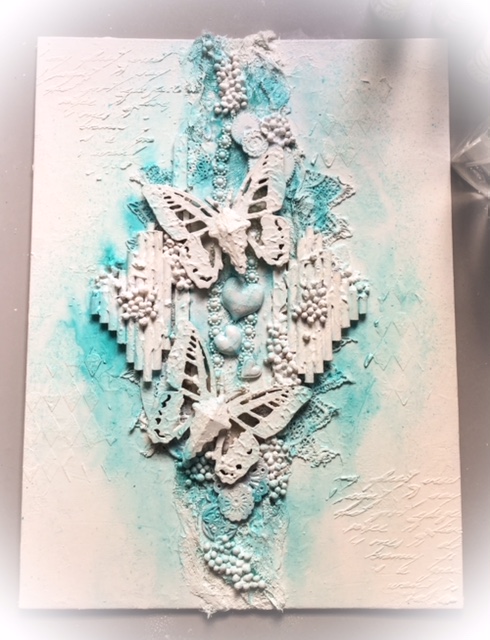
I have created an Easter themed canvas with lots of pretty flowers and of course a Bunny!


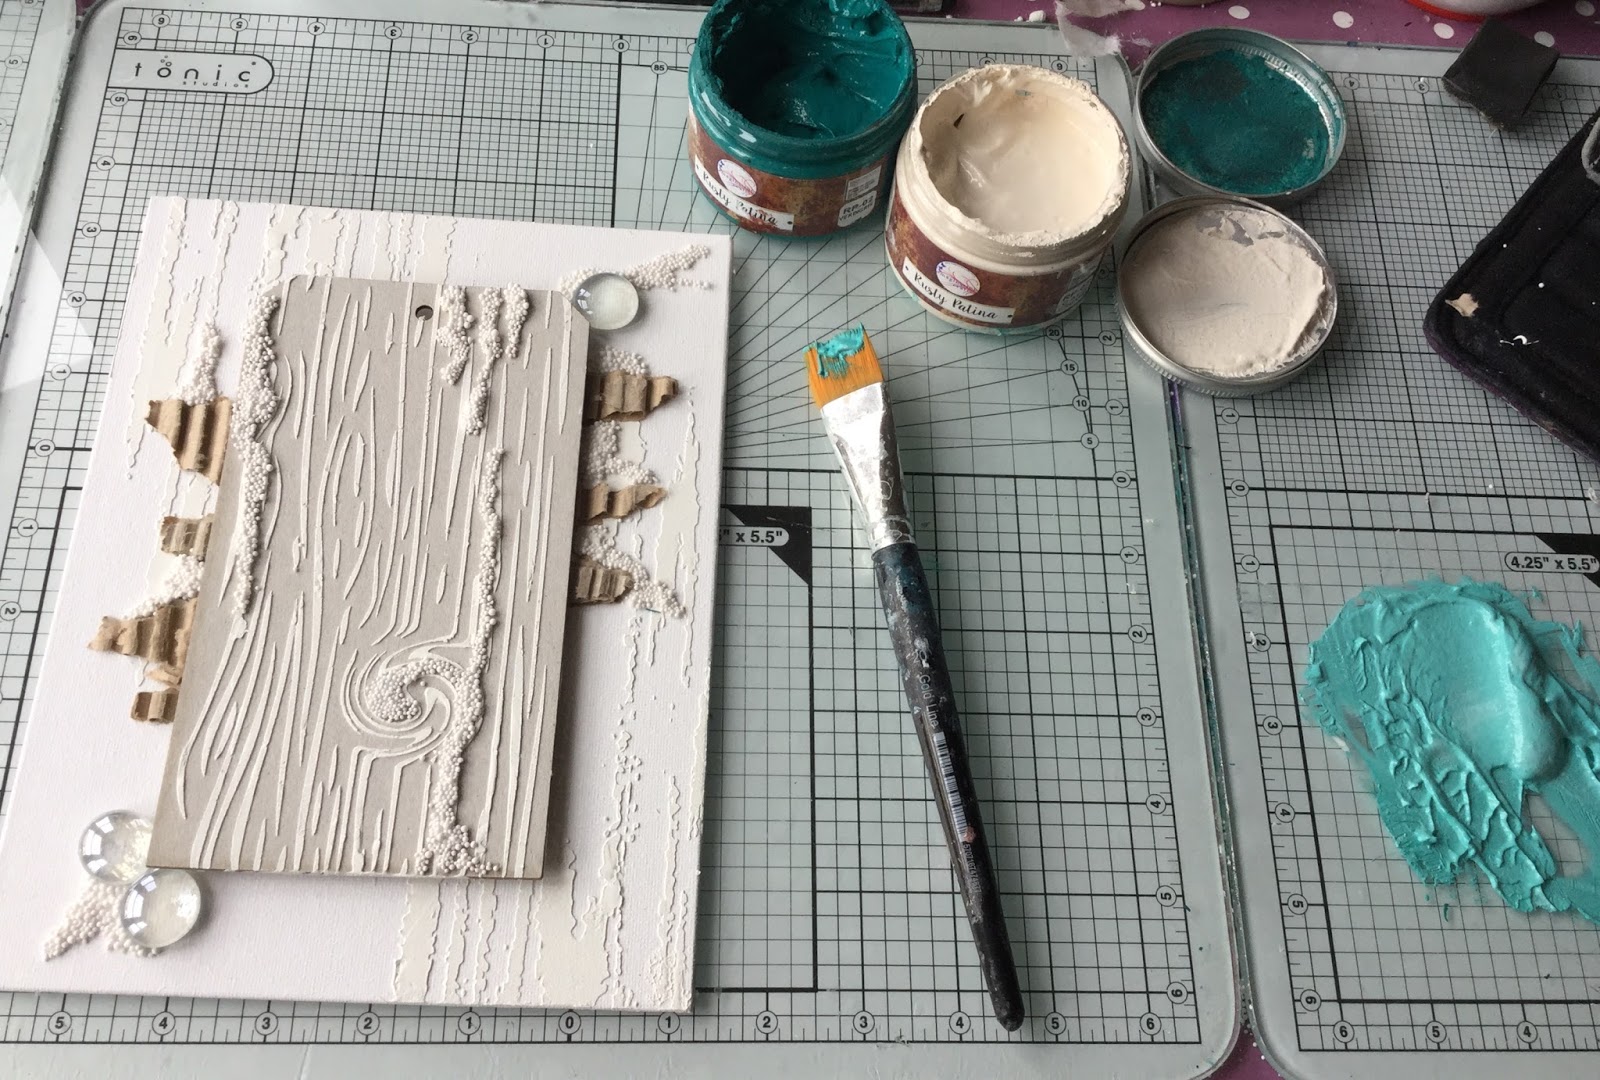
I’ve used a beautiful mandala stencil on the background using transparent relief paste.  I love texture. I then painted over it with a soft blue paint and added some pops of bright green to it.  Once it was dry I added some white dry brushing with gesso to soften the colours down.


Next I added my birdcage stencil using some chartreuse paint and added black and white details then I just added lots of floral embellishments leaving room for the Easter Bunny of course!..lol  To add lots of texture I added lots of Artsy Stones to fill gaps and build up along the edges of the embellished area.

For a full tutorial on this project  check out my facebook page: https://www.facebook.com/craftylass

The Team have made some gorgeous projects for you so please hop along with us:

CMP Designs

Have a wonderful Easter :) xx


Thursday, 14 February 2019

Valentine's Day Blog Hop

Hi Everyone

I am so excited to have been asked to join in the Valentine Blog Hop as I have never done one before so it's a real first for me :)  It gives me a chance to play with my Imagination Crafts goodies (not that I need an excuse...lol).

So I decided to create this gorgeous little heart canvas for you.

I used a white primed heart canvas. Firstly, I painted the surface with Imagination Crafts Rusty Patina in Duck Egg, spritzed with water and then added small areas of Rusty Patina in Soot.  I added more water to make the paints move together.  Allowed to dry.


Next I added some stencilling using Imagination Crafts Structure Paste through a Mandala stencil design.  Dry.  Using Starlight Paints in Orange, Banana Yellow and Rusty Patina in Rustique, I added some colour over the dried pasted design. Once dried I added detail script with a stencil.


I took some MDF Cogs from my crafty stash and added the Rusty Patina in Rustique over the entire surface of each.  I then applied more Rusty Patina to build the texture.  Once dry I added some highlight areas using the Starlight Paints in Orange and Banana Yellow and glued the pieces in position.


Finally, I added Structure Paste through a stencil to add detail to the MDF Bird.  Allowed to dry and then I painted the bird with Rusty Patina in Duck Egg and added gold highlights with Imagination Crafts Alchemy Wax in Inca Gold.  To finish the edges I added a little Rusty Patina in Soot.

I hope you like my project and enjoy the other designers creations.  Take a journey through the blog hop :) 


What I Used


Thanks 
for
Popping By
xx

Monday, 14 May 2018

Butterfly Tag Canvas with Imagination Crafts

Hi Everyone

We have a lovely day here in South Wales.  I hope you are enjoying the same.

Today's project has been created using Imagination Crafts fabulous Rusty Patina paints to give both texture and colour.  I hope you like it.  So let's get started!


 What I Did

  • First step is to get a small canvas, a chipboard tag and some cardboard.  You could you use the cardboard to cut the tag from also


  • Take the tag together with the  Wood Grain stencil and smooth the structure paste through the design.  Dry.  Clean stencil.


  • Using the Weathered Wash stencil add design to the canvas background edges.  Dry.  Clean stencil.


  • Tear some random strips from the cardboard exposing the ridges and glue to canvas.  Also glue a larger piece of cardboard to the rear of the tag to add depth.  Glue tag in to position.  Dry.


  • For the next stage I added some glue drips to the tag and canvas and covered them with Artsy Stones.  I also glued on some flat backed glass stones.  Dry.


  • Use the Rusty Patinas in Café Crème and Verdigris and mix tog3ethr to form a mid shade of pale green.  Paint over the entire piece.  Dry.


  • Now use the Verdigris and dry brush over some areas to begin building the layers of colour.


  • Next add the Rustique colour to your chosen areas.


  • It's time to start adding the highlights with the Café Crème colour using a foam sponge/cut an use foam.  Dry.


  • Using a sponge or a brush add some Starlight Wax in White Gold to add top highlights an to finish around the canvas edges.


  • The final step is to use the rice paper butterflies.  Cut out roughly and glue to some white card.  Cut out and add to the centre tag to finish.


  • Voila.  C'est fini! 


Wednesday, 7 March 2018

Inspire Butterfly Canvas

Hi Everyone

Glorious sunshine here today I hope it stays that way too :)

Today I have an 'Inspire' canvas project.  I have used my Imagination Crafts goodies together with some of my crafty stash.  Basically, I got loads of bits and bobs out from my craft room and began playing!  Once again I must apologise for the poor quality phots. So let's get going :)


What I Did
  • Firstly, grab some bits and bobs from your crafty stash and decide what you are going to use to begin with.  I changed my mind as I went along as you can see. :)


  • I started by sticking a mix of cheesecloth, fabric, bead trim and lace strips down the centre of the canvas. Build up layers.  Then I added other embellishments including cut up CD's, wooden skewers, metal shapes, crystals, straws and wooden butterflies.  


  • Next take some crackle paste, and add it to some areas.  I lightly pasted onto canvas surrounding the composition, on the butterflies and straws.  I also pasted the crackle paste through a couple of stencils to add texture to background.  Leave to dry.


  • Once paste is dry, gesso over the entire canvas.  Dry.  Now add the first colour of Mix Media Ink spray in light blue, adding water to blend out.


  • Continue with the next colour.  I used a mix of light green and blue sprays using the white to soften out.  Dry.


  • Next I added some Alchemy Wax in Bronze to pick up the texture details.


  • I finished the project off with an MDF word coloured with alchemy wax.


What I Used

Imagination Crafts Magibond Glue
Imagination Crafts Crackle Paste
Imagination Crafts Stencils - A4 Script and Harlequin
Imagination Crafts Mix Media Ink Sprays - Lt Blue, Blue, Lt Green and White
Cadence Mix Media Artsy Stones
Imagination Crafts Alchemy Wax - Bronze
Embellishments from my Crafty Stash


I hope you have been inspired.

Thanks
for
Popping By

MJ
xx