Showing posts with label Fabric Decoupage Glue. Show all posts

Monday, 14 May 2018

Butterfly Tag Canvas with Imagination Crafts

Hi Everyone

We have a lovely day here in South Wales.  I hope you are enjoying the same.

Today's project has been created using Imagination Crafts fabulous Rusty Patina paints to give both texture and colour.  I hope you like it.  So let's get started!


 What I Did

  • First step is to get a small canvas, a chipboard tag and some cardboard.  You could you use the cardboard to cut the tag from also


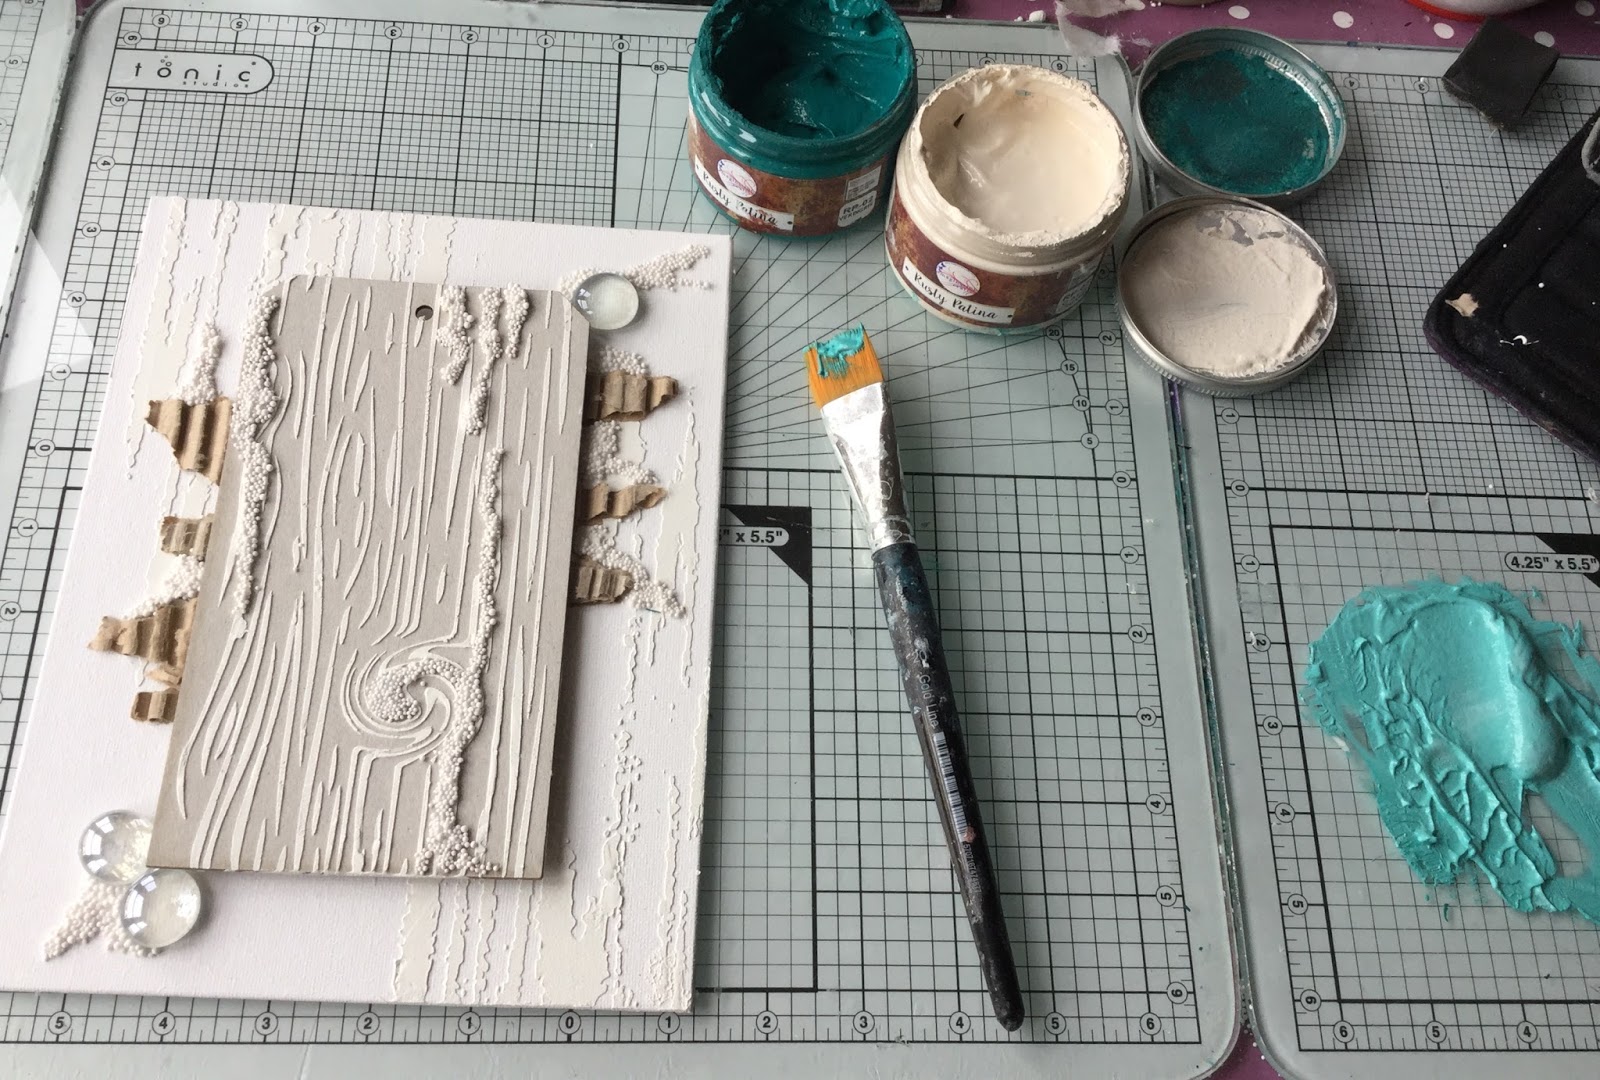
  • Take the tag together with the  Wood Grain stencil and smooth the structure paste through the design.  Dry.  Clean stencil.


  • Using the Weathered Wash stencil add design to the canvas background edges.  Dry.  Clean stencil.


  • Tear some random strips from the cardboard exposing the ridges and glue to canvas.  Also glue a larger piece of cardboard to the rear of the tag to add depth.  Glue tag in to position.  Dry.


  • For the next stage I added some glue drips to the tag and canvas and covered them with Artsy Stones.  I also glued on some flat backed glass stones.  Dry.


  • Use the Rusty Patinas in Café Crème and Verdigris and mix tog3ethr to form a mid shade of pale green.  Paint over the entire piece.  Dry.


  • Now use the Verdigris and dry brush over some areas to begin building the layers of colour.


  • Next add the Rustique colour to your chosen areas.


  • It's time to start adding the highlights with the Café Crème colour using a foam sponge/cut an use foam.  Dry.


  • Using a sponge or a brush add some Starlight Wax in White Gold to add top highlights an to finish around the canvas edges.


  • The final step is to use the rice paper butterflies.  Cut out roughly and glue to some white card.  Cut out and add to the centre tag to finish.


  • Voila.  C'est fini! 


Monday, 5 March 2018

Beautiful Florals Round Canvas

Hi Everyone

Today I have made a floral circle canvas project in colours that I don't normally go for!  I asked my friends to choose a colour scheme from a choice of five colour combos I gave them.  And the one it turned out to be, had shocking pink and teal in it.  I rummaged through my Imagination Crafts stuff and picked out the Mix Media Ink sprays.  This is my take on it.  So let's get going!


  • Start by grabbing book pages, white gesso and a background stencil


  • Tear the pages onto random pieces and glue onto the canvas.  Take the stencil and smooth through some structure paste in random areas.  Dry.


  • Next add some pieces of cheesecloth around the edges.  Dry.


  • Gather up a selection of embellishments and glue onto canvas to make the composition you like.


  • Add some Artsy Stones for extra texture and to fill gaps.  Using crackle paste, spread roughly with a pallet knife around the outside edge of canvas.  Leave to dry.


  • Next take white gesso and dry brush over the entire canvas and embellishments.  Dry.


  • Put together your colour pallet including a water spray.


  • Using the mix media ink spray in fuchsia, begin adding colour using white ink spray and water to soften the colour if needed.  I don't worry at this stage as later it will be dry brushed with white gesso.  Dry.

  • Add some light green to make some areas darker.  Dry.


  • The ink needs to be dry for the next stage to get best result.  Take the white gesso and start dry brushing over the canvas and embellishments.  Dry in between each coat and repeat until colour wanted is achieved.  


  • Once all the gesso dry brushing is done, add a few highlights using Starlights White Gold paint.  Add word to finish.


  • Viola!  C'est Fini :) 


What I Used

Imagination Crafts Fabric Decoupage Glue
Imagination Crafts Structure Paste
Imagination Crafts White Gesso
Imagination Crafts Crackle Paste
Imagination Crafts Artcutz - Leaves
Cadence Mixed Media Artsy Stones
Imagination Crafts Mix Media Ink Sprays - Fuchsia, Light Green and White
Imagination Crafts Starlight Paint - White Gold
Embellishments from my crafty stash


I hope you have been inspired.

Thanks
for
Popping By

MJ
xx


Thursday, 1 March 2018

Altered Bottle with Imagination Crafts

Hi Everyone

Well today I was stuck at home like a lot of people because of 'The Beast from the East'!  All I know is that it has been very cold and a great chance to do some crafting.  I had a bottle sat in the kitchen waiting for me to attack it and today was the day! 

So looking at my crafty stash I decided to use my ink sprays, pastes, stencils and bits and bobs.  So let's go.... :)


What I Did

  • Take a clean glass bottle and paint it with gesso.  I painted two coats, drying between each coat.

  • Using structure paste and a couple of stencils carefully smooth pasted through design.  Dry.


  • Next add some crackle paste to some areas of the bottle.  Leave to dry (the cracks are better if left to dry without a heat tool).


  • Choose some embellishments that you would like to use on the bottle.  Use a mixture of bits and bobs from your crafty stash (I used some Artcutz plus some wings made from a mould and structure paste together with some metal pieces).  I painted the chipboard pieces with gesso.


  • Decide on how you want your bottle decoration to look and begin gluing them into position.


  • Glue embellishments into place.  Using Fabric Decoupage Glue (fab thick glue) glue some of the Artsy Stones to add extra detail.  Leave to dry.  Then paint over the embellishments and Artsy Stones with white gesso.  Dry.


  • Now on to the fun bit - inks and Rusty Patinas!  Start by using the Turquoise and Light Blue Mix Media Ink Sprays, water and a baby wipe to blend the ink to a soft finish.  Take the pump out of the bottle and drop colour from this into some areas to darken.  Dry as you go.


  • Rusty Patinas - Rustique and Verdigris; use a small paintbrush to add some Rustique patina to small areas at a time.  Use water to blend and soften the colour.  Repeat until you are happy with the look of the bottle.  Paint over all the elements softening with the baby wipe as you go.  Add little touches of Verdigris patina by dry brushing.


  • For the final touches use Starlight Wax in White Gold to add highlights.
  • Voila!  C'est Fini :) 

What I Used

Imagination Crafts White Gesso
Imagination Crafts Structure Paste
Imagination Crafts Crackle Paste
Imagination Crafts Art Stencils - Weather Wash, Distressed Letter and Past Times 
Cadence Mix Media Artsy Stones
Imagination Crafts Mix Media Ink Sprays - Light Blue and Light Green
Imagination Crafts Rusty Patina - Rustique and Verdigris
Imagination Crafts Starlight Wax - White Gold
Imagination Crafts Fabric Decoupage Glue 
Imagination Crafts ArtCutz - Various
Embellishments - Crafty Stash


I hope you have been inspired.

Thanks
for 
Popping By

MJ
xx


Sunday, 4 February 2018

Imagination Crafts Rice Paper Tablet Cover Upgrade

Hi Everyone

Today I fancied a little bit of a crafty lunchtime whilst waiting for the Italy v England rugby match to start (Six Nations Championship 2018).  I wasn't sure what I was going to do until I looked on my coffee table, as I supped my coffee, and saw my old tablet cover which I was about to throw in the bin.  So I thought okay if it turns out to be hideous I can just throw it in the rubbish and I haven't lost anything really.  So that's the story now let me tell you what I did :) 

I love, love, love, all my Imagination Crafts products but today I decided to use some of the wonderful rice paper together with Starlight Paints and Fabric Decoupage Glue.  I love this glue as it makes the rice papers waterproof!  Yes you read it right....waterproof.  So you can use the rice papers with the glue and once completely dried it is washable.  Imagine the things you can do with clothes, bags, etc!  

Fabulous Stuff I Used
  • Imagination Crafts Rice Paper - MA 006
  • Imaginations Crafts Fabric Decoupage Glue
  • Starlight Paints - Topaz, Rich Gold and Black
  • Imagination Crafts Gesso - White
  • Paints Brushes and Palette Knife
What I Did

Firstly, I painted the front and back of the tablet case with White Gesso.  I used two thin coats allowing each layer to dry in between.  I carefully dried with a heat tool.


Next I cut two pieces of rice paper to size.  Then using the Rich Gold Starlight Paint and a small paintbrush,  I coloured my chosen details on the rear of the rice paper design.  When this was dry I added a wash over the whole piece with the Topaz watered down, leaving some white areas.  Leave to dry. 


Now it was time to glue the coloured rice paper to the tablet cover.  As I was covering a larger area, I used my pallet knife to spread a thin layer of Fabric Decoupage Glue a small area at a time so that it didn't dry before I got to the next area.  Carefully place the rice paper onto the glued area and smooth it down to remove any bubbles and ensure the edges are glued down.  I worked my way up the covers.  Then using a soft paintbrush I added a coat of the glue to the outside to seal it and left it to dry.


The last thing I did to my project was to add colour around the edges.  I took the Starlight Paint in Black together with my domes bristle stencil brush and dabbed it around the edges.  As I was going around I had a baby wipe in my hand so that I could smudge the paint using a damp finger giving a softer looking edge.


So now it is NOT going in the bin.....Yay!  I love it.  I hope you like it too.  


I hope you have been inspired :) 


Thanks
for
Popping By

MJ
xx